Side Ramp
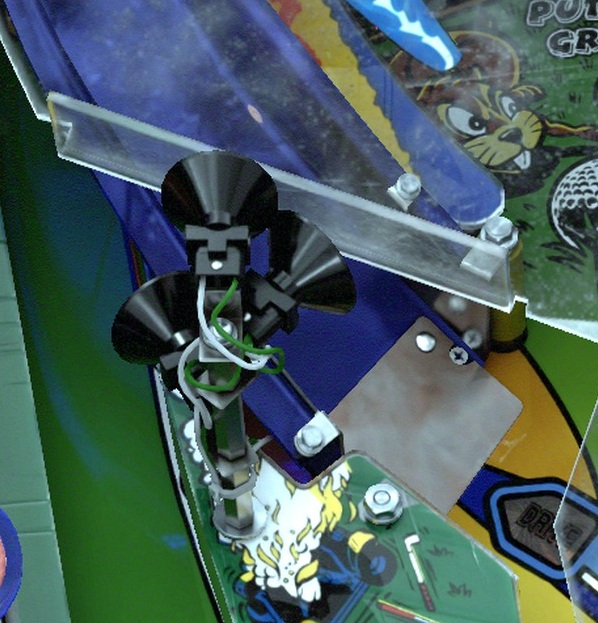
Angled entrance on the upper left, below Putting Green. Use the upper-right flipper as the ball crosses it. Its mouth is separate from the neighboring Left Cart Path; a late flip can hit the supports.

Williams · 1997 · VPW Rawds Edition 1.0
Lock balls behind Bud and Buzz for Multiball, then turn Side Ramp Jackpots into airborne Hole-in-One Super Jackpots.
Start with the two-lock Multiball. Bud lives beneath Center Ramp; Buzz beneath Right Ramp. The distinctive scoring shot is Hole-in-One: launch a ball off Slam Ramp into the elevated cup.
Golf is a separate route: finish holes at the lit Putting Green. Nine holes start Hole-in-One Challenge, a four-ball scoring round.
Identify the three ramps before playing. Side Ramp is the angled shot from the upper flipper; Center Ramp and Right Ramp are the long neighboring entrances. Choosing the correct ramp matters more than hitting any ramp hard.

Sources: Bowen Kerins tutorial · Nemesis’s guide
These crops show the installed table. Suggested flippers are practice starting points; cabinet feeds and rebounds have not been tested. The elevated Driving Range hides portions of the lower mechanisms.

Angled entrance on the upper left, below Putting Green. Use the upper-right flipper as the ball crosses it. Its mouth is separate from the neighboring Left Cart Path; a late flip can hit the supports.
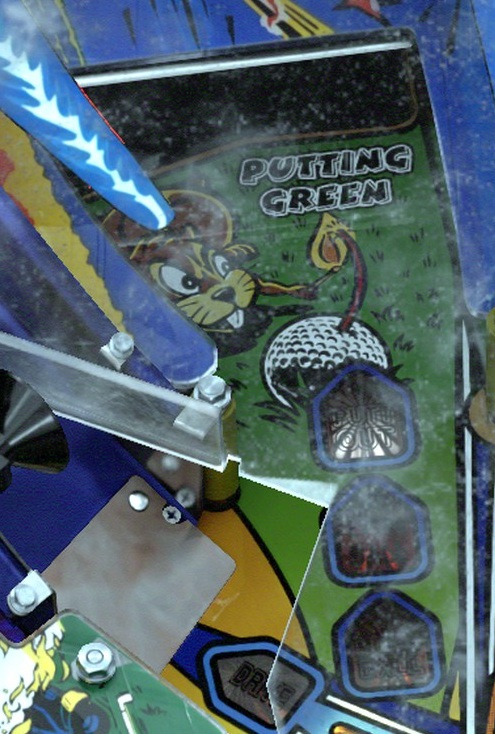
Large scoop on the upper left, behind the PUTTING GREEN label. Try either right flipper. Aim above the angled Side Ramp entrance. Prepare for an eject rather than expecting a ramp return.
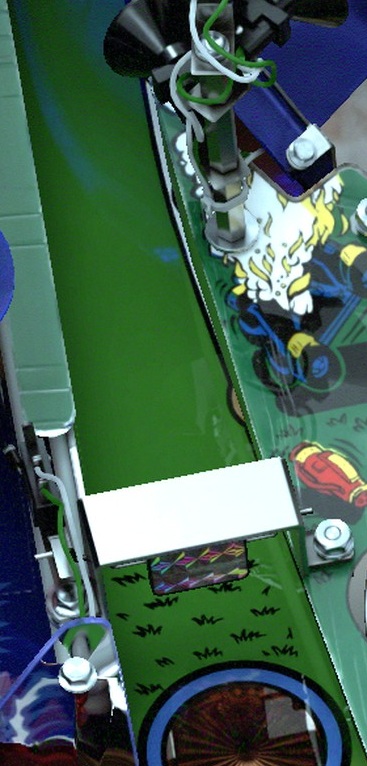
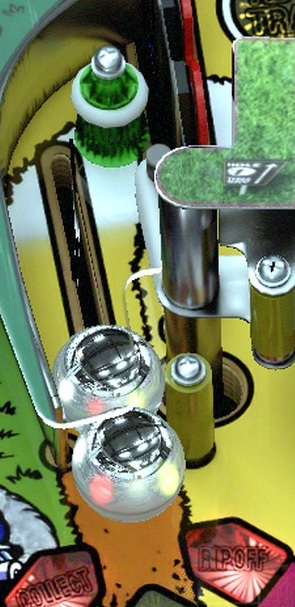

Partly covered saucer below the bottom Jet, beside TRAP READY. It usually receives loose balls rather than a direct aimed shot. Once the ball is held, follow the eject instruction. The blue return hides its mouth in this crop.

Three bumpers down the left edge. ADV JETS is the small adjacent target. Use the ball position and lamps to identify this area. Loose exits can cross the center; do not watch the bumper scoring instead of the returning ball.

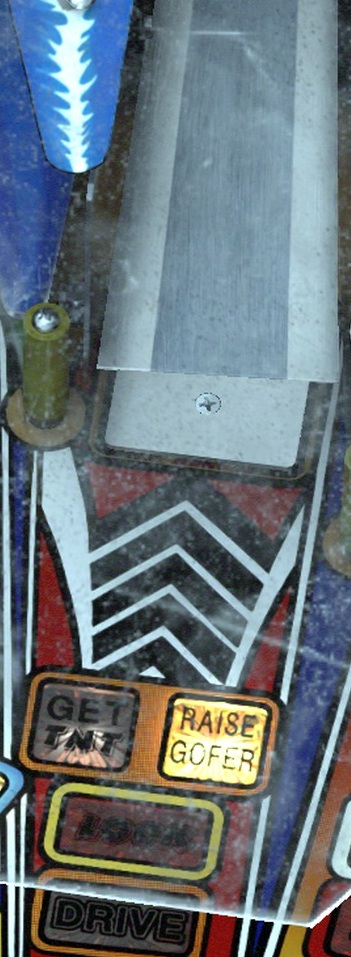
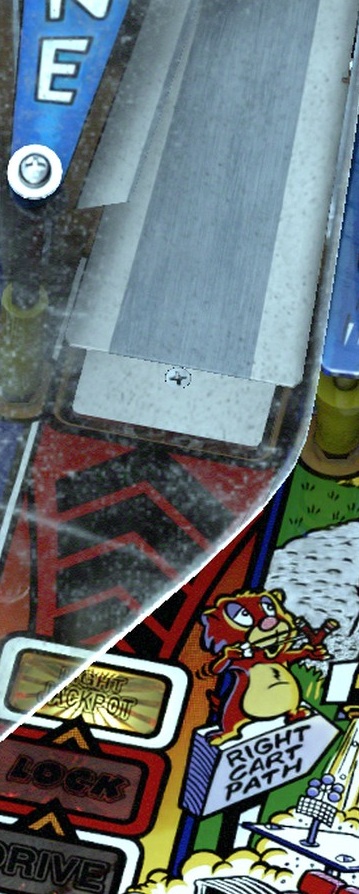
Long ramp immediately right of Center Ramp; Buzz lives beneath it. Try a left-flipper forehand. A controlled right-flipper backhand may reach the open lock. Test its angle from your cradle.
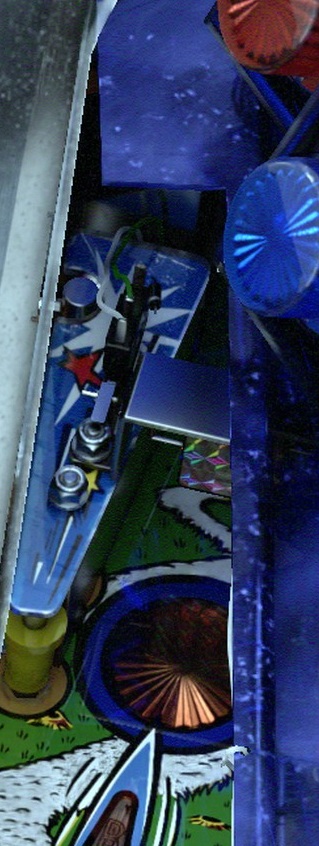
Outer lane immediately right of Right Ramp, beneath blue plastic. Try a left-flipper forehand into the narrow entrance. Distinguish the orbit from the wider ramp beside it; watch a short shot return.
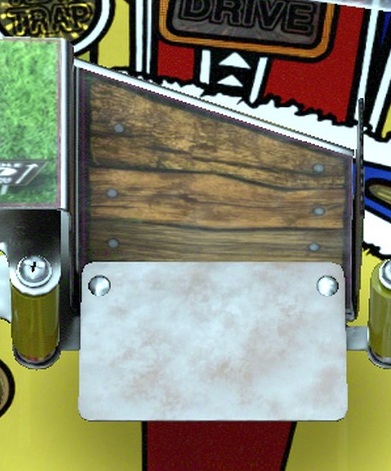
Hinged metal flap in the middle, below Center Ramp. From a left-inlane feed, use the lower-left flipper when the flap is down. Aim into the raised Driving Range; do not shoot the upright flap as if it were an open ramp.
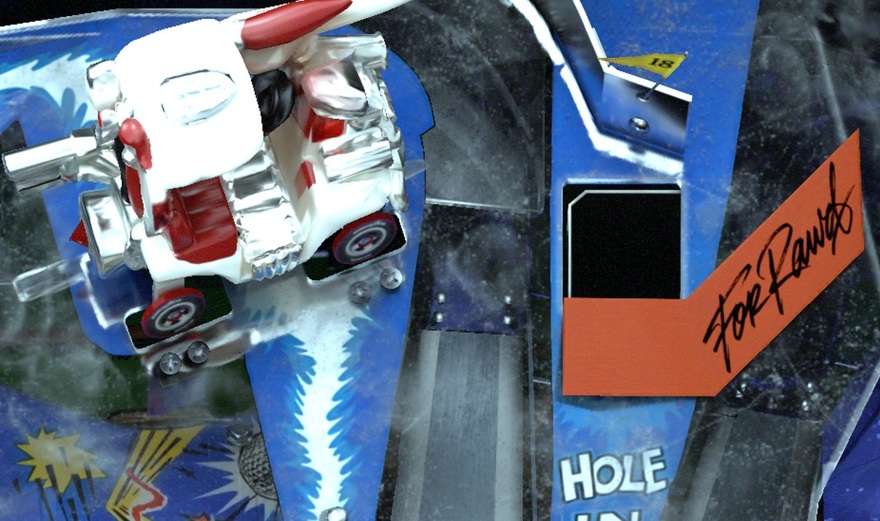
Elevated clear platform above the ramps: Cart left, Hole-in-One cup right. Reach it through the lowered Slam Ramp. Try changing lower-left-flipper timing in small steps to shift the airborne landing toward the cup. Watch where a miss falls.

Four angled letter targets on the lower right, plus a facing fifth target. Try a left-flipper forehand at the facing target. The other targets also receive Sand Trap ejects; their orientation is different from a straight-ahead bank.
Upper-flipper and lock-backhand examples: Bowen tutorial · part two
Soft-plunge the skill targets below Side Ramp to light Putting Green. A strong plunge can climb Side Ramp for a Slam Ramp attempt. Lock serves also offer a skill shot.
Use the first launch to see where this plunger sends the ball. Reduce strength if you pass the targets; increase it if the ball falls short. The guide gives no fixed plunger percentage.
Sources: Keefer’s rules

A raised ramp, a visible gofer and an open lock are different targets. Look at the mechanism after each successful shot. When a gofer blocks the opening, expect a rebound instead of a ramp return.
Sources: Bowen Kerins tutorial

Side Ramp scores the Jackpot. Hole-in-One then scores the Super Jackpot. Right Ramp or a Super relights Side Ramp. The first Super pays double; the second awards an extra ball; the third awards a Special.
If you lose multiball before any Jackpot, shoot Putting Green within ten seconds to restart. If a raised gofer times out, raise it again.
Later locks need more Center Ramp shots. Avoid three consecutive Center Ramp shots: Bud can block the entrance. Use Center Ramp twice, then Right Ramp, before returning to Center Ramp.
For the Side Ramp Jackpot, feed the upper-right flipper through Left Cart Path. After collecting it, Center Ramp provides another approach to the lit Super attempt.
Practice recognizing the upper-flipper feed before trying to hold spare balls. Keep watching the lower playfield during that attempt: another ball may reach a flipper while the Jackpot shot is still traveling.
Sources: Williams original rules · Nemesis’s guide · Player strategy discussion · Bowen Kerins tutorial · Bowen tutorial, part two
Each hole starts at seven strokes. Drives, gofer hits and putting out reduce that number. A gofer hit also lights Slam Ramp for one shot.
The first putt starts lit. Afterwards, make two lit drives during the first nine holes, or three during the second nine, then shoot Putting Green. Hole-in-One completes the hole in one stroke. Sand Trap and unsaved outlanes add strokes.
Lit DRIVE arrows mark the ramps and Cart Paths used to reach Putting Green. Finishing a hole also collects the Whirlwheel award indicated by its pointer. Jets, spinners and Captive Ball move the wheel.
Before shooting the putt, read the selected award. A ready putt can start another scoring feature; it is not always just a way to finish the hole. Recheck the display after collecting it.
Sources: Williams revision notes · Nemesis’s guide · Williams original rules
Side Ramp or completed Captive Ball lights the left inlane. Crossing it lowers Slam Ramp.
Side Ramp raises the Hole-in-One value. Repeating the Side Ramp–Slam Ramp route builds a shot that becomes more valuable during a long game.
Cart hits normally start Cart Attack at three, Pop-a-Gofer at eight and Speed Golf at thirteen.
Watch the actual flap, not just the target beyond it. When Slam Ramp is raised, the airborne route is unavailable. During a left-inlane feed, prepare the lower-left flipper early enough to attempt the lowered ramp.
Sources: Williams original rules · Player strategy discussion · Keefer’s rules
The physical Whirlwheel sits below the ramps. Its selected award appears at the pointer. Use the following actions after the award announcement; several awards start a feature immediately, while others light a later collection.
Gofer's Choice randomly gives Super Jets, Big Points, Dance Party's loop scoring, a doubled new skill shot, or Super Drive's ready putt.
After hole seven, Short Circuit replaces the wheel award: hit KICK to freeze the rising value, then Buzz to collect.
Sources: Keefer’s rules · Nemesis’s guide
Complete the five Captive Ball lights twice, then hit Captive Ball while Ripoff flashes. During Ripoff, Center Ramp and Right Ramp score; completing another Captive Ball sequence adds a ball.
Ripoff starts with two balls.
Making both scoring ramps doubles the Ripoff value.
The Wheel can start Speed Golf. Aim through Slam Ramp at the Driving Range; its upper-playfield shots score during this multiball.
Speed Golf starts three balls. Switch hits increase its value; Hole-in-One doubles the award.
Ripoff and Speed Golf ending/restart details, and the maximum added balls, have not been verified for this installed code. Read the display after losing balls before choosing the next scoring shot.
Captive Ball progress survives a drain.
Sources: Williams original rules · Bowen Kerins tutorial · Nemesis’s guide

Complete nine holes to start four balls. Challenge activates Ripoff, Super Jets, Big Spinners and increasing million-point Side Ramp shots. Hole-in-One awards Special; Side Ramp relights it.
Finishing eighteen holes awards ten million, begins the course again and adds 2.5 million to later end-of-ball bonuses.
After Challenge, read the current hole on the display before choosing another drive. The exact ending and course-reset behavior of this installed code remains unverified.
Begin with the Side Ramp you already practiced for jackpots. When the return gives you an airborne attempt, identify the Hole-in-One cup before flipping. The extra scoring lights do not make every flashing shot equally easy to reach.
Sources: Nemesis’s guide · Player strategy discussion
Finish KICK to relight the left-outlane kickback. Each letter advances from unlit to flashing to solid; the fifth target supplies a letter hit.
The adjacent target lights Sand Trap. When caught there, use a flipper button to fire at the moving KICK light before the countdown expires. Jets build the award.
The later software normally sends Putting Green ejects toward Jets; the operator can select the faster middle-playfield ejection instead. Multiball starts can use that faster ejection regardless.
Prepare for a kickout before looking back at the score. Treat a lit kickback as help for the left outlane, not permission to ignore the ball crossing the bottom of the table.
ADV JETS advances bumpers toward flashing; all three flashing enables Super Jets.
Sources: Williams original rules · Williams revision notes
Collect lit extra balls at Putting Green. The Wheel, Super Jackpots and Cart Path progression provide other opportunities.
An inlane lights the opposite Cart Path. Successive awards raise the bonus multiplier to five times and light an extra ball. Low-stroke holes make that multiplied bonus more valuable.
Do not confuse an extra-ball lamp with an extra ball already earned. Check which collection is lit after a wheel award.
Early-hole extra-ball thresholds depend on settings; follow the display.
Sources: Nemesis’s guide · Player strategy discussion · Williams manual
Main Multiball and Cart Attack grow more valuable across repeated play. Build control of Center Ramp, Side Ramp and Hole-in-One before chasing every smaller award.
When your immediate goal is unclear, read three things: the lock lights, PUTT OUT and the lowered Slam Ramp. Choose a route that matches the ball's present flipper. A difficult shot becomes easier to learn when you recognize the same setup again.

Sources: Player strategy discussion
Manufacturer rules, revision notes, independent rules and physical-game tutorial footage inform this guide. Operator settings and cabinet gameplay have not been verified.