PINBALL FIELD GUIDES
All tables
TechniquesDictionary
Blood Machines — restyled cabinet backglass

VPinWorkshop Original · 2022

Blood
Machines

Finish seven missions and the three character multiballs. Then complete the Final Chapter and shoot the upper sky loop to defeat Galdor.

Three synthetic warriors study a holographic mission map as a skull ship approaches
Act ILearn.

Find the main routes, advance Mima, and give every shot a purpose.

Objective

Reach the Final Chapter

The seven mission lamps and the Mima, Corey, and Tracy lamps form the ten-part checklist. Finish every lamp. The Final Chapter waits until only one ball is moving before it starts.

The installed table

Find the shots

Three synthetic warriors around a neon pinball machine as a skull-shaped starship approaches

Mima shield + gravity hole

Mima ship, shield target and gravity-hole lock on the installed playfield

Hit the captive shield three times. The wall drops and the glowing hole under the ship becomes a lock. Put three balls there.

How to try it: Hold the ball still on the right lower flipper. Aim at the dark opening of Mima shield + gravity hole, not at its rim or the nearby posts. After the ball settles in the hole, watch where the machine kicks it back and regain control.

Left orbit + Mission

Left orbit and Mission VUK on the installed Blood Machines playfield

After a mission, one outside orbit flashes. Make it, then shoot the round MISSION hole at lower left to begin the next mission.

How to try it: Hold the ball still on the right lower flipper. Aim through the open channel at the bottom of Left orbit + Mission; the ball must pass the entrance switch and continue up the lane. If a weak shot rolls back down the same lane, let it return to a flipper before trying again.

Lower playfield

Flippers, inlanes and character progress lamps on the installed playfield

The three name lamps are the multiball checklist. Watch returns through the inlanes; a settled ball is easier to aim than a rolling one.

How to try it: This is a status area, not a shot. Read its lamps while the ball is held on a flipper, then aim for the named shot whose lamp is still dark.

Top-down capture of the installed Blood Machines 2.0 playfield
The installed Blood Machines 2.0 table, captured from cabinet .94. Tap to enlarge.

Center VUK + main ramp

Center shots on the installed Blood Machines playfield

The center VUK starts a ready multiball. The broad ramp beside it scores Corey jackpots and advances several missions.

How to try it: From the left lower flipper, aim into the center vertical eject hole when its lamp calls for it. For the main ramp, aim through the posts at the ramp's bottom and use enough force to climb it. Watch the kickout or ramp return before choosing the next shot.

Right orbit + sky loop
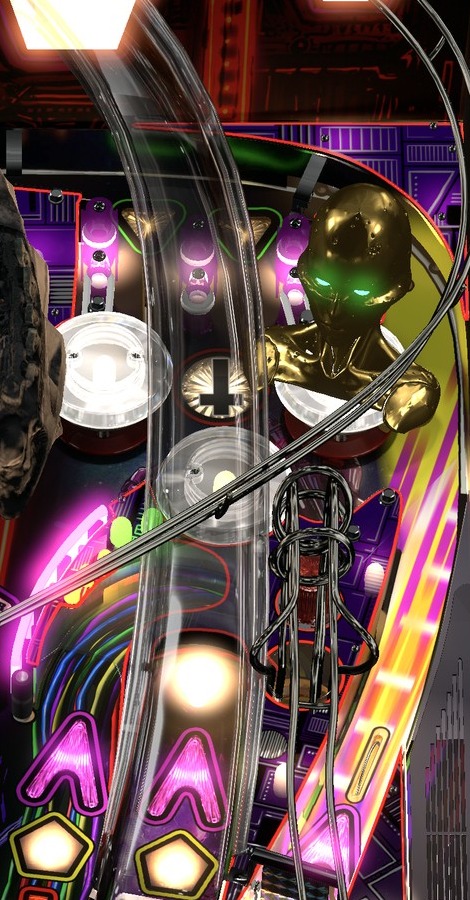
Right orbit, upper flipper and sky-loop entrance

The right orbit prepares missions and scores Tracy jackpots. The small upper flipper shoots the sky loop for Corey progress, Corey Supers and the final winning shot.

How to try it: Hold the ball still on the left lower flipper. Aim through the open channel at the bottom of Right orbit + sky loop; the ball must pass the entrance switch and continue up the lane. If a weak shot rolls back down the same lane, let it return to a flipper before trying again.

Scavenge scoop
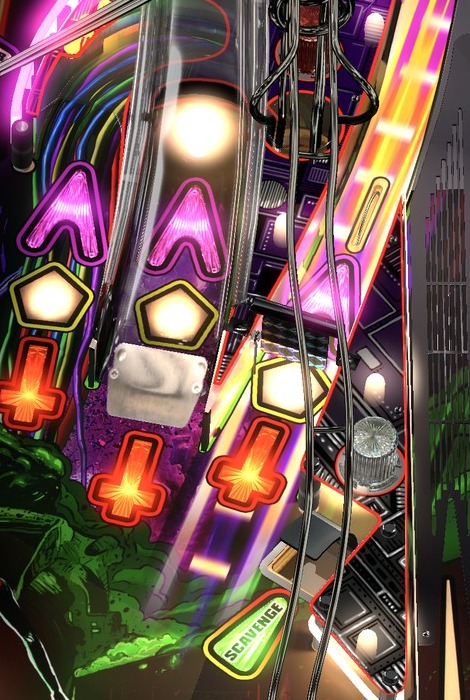
Scavenge targets and scoop at lower right

Knock down all three drop targets, then shoot the scoop. Awards cycle: Mystery, Double Scoring, Super Spinners.

How to try it: Hold the ball still on the left lower flipper. Aim at the dark opening of Scavenge scoop, not at its rim or the nearby posts. After the ball settles in the hole, watch where the machine kicks it back and regain control.

A route with a recovery

First game

1 · Take the flashing lane

On the plunge, make the flashing top lane for the skill shot. Do not sacrifice the ball chasing the advanced version yet.

2 · Hit the shield three times

This opens Mima’s gravity hole and starts a 30-second, 2× playfield multiplier. Every later group of three raises it, up to 5×.

If the shield is costing balls: switch to missions. Make the flashing outside orbit, then shoot the lower-left Mission hole. Return to Mima from a controlled ball.
Three chrome pinballs travel through three different neon machine routes
Act IIPlan.

Play through seven missions while you advance Mima, Corey, and Tracy.

Seven jobs

Missions

The Hunt

Send the ball through the gun route, then hit the newly lit major shot. Repeat three times. You have 100 seconds.

Resurrection

Make 25 Mima loops beneath the ship. Either direction counts. You have 75 seconds.

Chase

Two major arrows light. Hit either; a new pair appears. Four hits finish it in 75 seconds.

Portal Room

The hatch opens into the lower mini-playfield. Use its two small flippers to clear all six targets.

Heart of Steel

Get 25 pop-bumper hits in 75 seconds.

Extra balls

Three completed missions lights one; six lights another. Both are earned at Ship Cannon. The game allows two extra balls.

Three names

Multiballs

A multiball counts toward the finale when it ends; you do not have to make its Super. Still, take at least one Super when you can. The shots teach the same routes used later.

Useful detours

Scavenge and Ship Cannon

Scavenge

Clear three drop targets, then enter the scoop. The three awards repeat in order: a random Mystery; Double Scoring; then five-times spinner scoring for 30 seconds.

Prepare before releasing balls

playing two features at the same time

Mission shots and character progress often share the same orbits, ramp and VUK. Advance a mission until its useful arrows are ready, then start the character multiball. The extra balls make the shared shots easier to complete.

  1. Ready a missionMake the flashing outside orbit, then enter the Mission hole.
  2. Leave multiball readyFinish the last Mima lock, Corey insert or Tracy insert, but wait at the center VUK.
  3. Start the missionConfirm its arrows are active before releasing the multiball.
  4. Take the VUKScore the shared mission and character shots while several balls are moving.

Do not postpone a safe multiball indefinitely. A completed character counts toward the Final Chapter after its multiball ends, even if the Super Jackpot was missed.

Control the center returns

Stay alive

The shield and center mechanisms can send the ball back quickly. Hit them from a cradle and keep the opposite flipper ready. If the ball reaches an inlane cleanly, catch it before choosing the next mission or lock shot.

During multiball, take the Ship Cannon add-a-ball while it is available. In the Final Chapter, survival changes: the battle fails when one ball remains, so keep shooting the broad center-right routes instead of trying to trap every ball.

Turn progress into value

Scoring

  1. Raise the multiplierEvery three shield hits advances the timed playfield multiplier, up to 5×.
  2. Use Double ScoringTake the second Scavenge award when a multiball or mission is ready, not on an empty playfield.
  3. Earn a SuperMima loops, Corey’s main ramp and sky loop, or Tracy’s orbits and VUK lead to their Supers.
  4. Keep advancing chaptersThe Final Chapter is both the long-game goal and the largest concentration of scoring shots.
Three synthetic warriors face a huge skull machine as many chrome balls fly through a mechanical cathedral
Act IIIFinish.

Survive the 15-ball battle, then use the upper flipper for the winning sky loop.

All ten lamps complete

Final Chapter

  1. Release: hit the under-ship route to begin the sequence.
  2. Orbits: make seven orbit shots.
  3. Under the table: clear all three targets on one side of the mini-playfield, then all three on the other.
  4. Galdor: the machine releases 15 balls. Hit the center VUK, main ramp, and right orbit four times total.
  5. Final shot: shoot the sky loop.

Do not cradle. The battle fails when only one ball remains. Keep balls alive, swing at the three lit center-right shots, then look up at the upper flipper for the sky loop.

Your cabinet

Your table

This guide is for the installed Blood Machines 2.0 VPX original on cabinet .94. The installed script is the rules authority; VPinWorkshop’s official rule card was the cross-check. The playfield and every close-up above came from that installed table.

A dedicated 36-minute video tutorial was found but not reviewed: it has no captions or chapters, and its audio stream was unavailable here. Where the display disagrees with this guide, trust the display.