Field guide

Cuphead Pro · PuP Perdition 1.2

Finish ten contracts on one ball, then complete either target row once more to defeat the Devil.

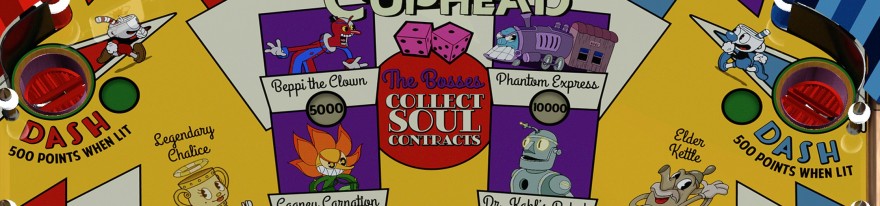
Cuphead Perdition — restyled cabinet backglass

The whole game

Objective

A contract is one completion of the three C-U-P targets on the left or the three M-U-G targets on the right. Complete either row ten times without draining, then complete either row again for the final Devil award.

Ball one plan: pick the bank you can hit cleanly, finish whole rows, earn the fifth-contract extra ball at the upper-right kicker, then use Perdition two-ball play for contracts nine, ten, and the final bank.

S-O-U-L is the score engine. Complete the four top lanes to raise the end-of-ball multiplier to 2x, 3x, then 4x. Perdition is the survival engine: light three lane lamps, hit the Devil bumper, and two balls are loose.

  1. ContractsComplete C-U-P or M-U-G. Either bank counts.
  2. Extra ballContract five lights it at the upper-right kicker. Claim it before the Devil bumper cancels it.
  3. PerditionThree lit lane lamps hold a ball. The Devil bumper releases it for two-ball play.
  4. FinaleContract ten starts the Devil event. The next completed bank wins.

Find your shots

Shots

Two cup-headed cartoon adventurers cross a haunted carnival pinball field toward a casino-master shadow

The S-O-U-L lanes

The four S-O-U-L lanes at the top of the table

Four top lanes, one letter each. Complete S-O-U-L to raise the bonus multiplier: 2x, then 3x, then 4x. Use the lane-change buttons before the ball reaches the top so the unlit letter is in its path.

How to try it: Hold the ball still on the right lower flipper. Aim through the open channel at the bottom of The S-O-U-L lanes; the ball must pass the entrance switch and continue up the lane. If a weak shot rolls back down the same lane, let it return to a flipper before trying again.
The Devil bumper

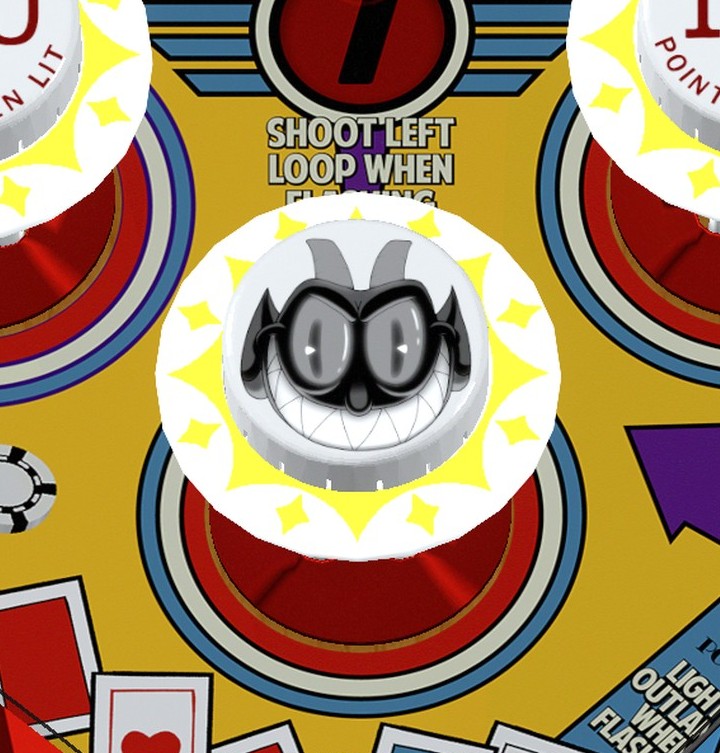
The Devil bumper in the centre of the table

The round bumper in the middle. After Perdition has captured a ball, hit this bumper to release it. That starts two-ball play and clears the Perdition lamps.

How to try it: Hold the ball still on the right lower flipper. Aim into the opening at The Devil bumper, avoiding its rim and nearby posts. Watch where the machine kicks the ball back and regain control.

The C-U-P and M-U-G targets

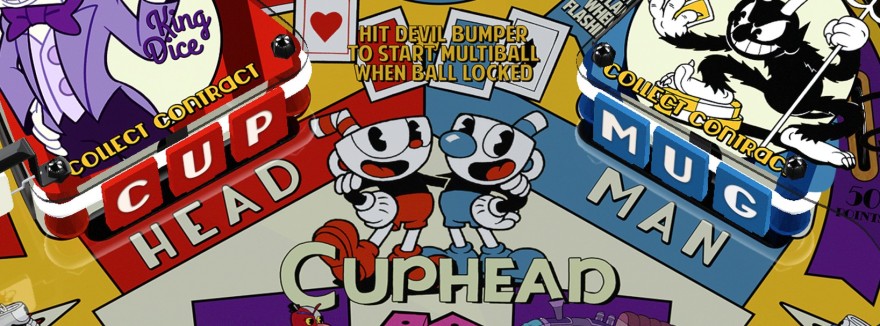
The two rows of three targets, C-U-P on the left and M-U-G on the right

The contract banks. Knock all three targets down in either row for one contract. Shoot outer targets first when you can; center-row hits are more likely to rebound toward the wider middle gap.

How to try it: Hold the ball still on the right lower flipper. Aim at the flat rectangular faces in The C-U-P and M-U-G targets, one target at a time; do not aim at the gaps or the plastic above them. Expect the ball to rebound toward the middle after contact.

Full Cuphead Perdition 1.2 VPX playfield showing SOUL lanes, drop banks, Devil bumper, Perdition lane and upper-right kicker
The installed table, from above.
Open full-size playfield reference →

The upper-right kicker

The kicker in the upper right, marked 3X LOCKS BALL

The extra-ball award lane. It also scores more for each lit Perdition lamp. When Extra Ball is lit, make this shot before touching the Devil bumper.

How to try it: Hold the ball still on the left lower flipper. Aim into the opening at The upper-right kicker, avoiding its rim and nearby posts. Watch where the machine kicks the ball back and regain control.

The Perdition lane

The Perdition lane down the far right of the table

The far-right lane. Each required trip lights a lamp; the third lamp captures the ball and serves a second one. Lit lamps stay lit until two-ball play begins.

How to try it: Hold the ball still on the left lower flipper. Aim through the open channel at the bottom of The Perdition lane; the ball must pass the entrance switch and continue up the lane. If a weak shot rolls back down the same lane, let it return to a flipper before trying again.

The DASH targets

The two DASH targets, one each side, mid-table

Two mid-table DASH targets. The three small targets on the left light both DASH targets for 500 each. The right DASH target lights the lanes beside the flippers.

How to try it: Hold the ball still on the left lower flipper. Aim at the flat rectangular faces in The DASH targets, one target at a time; do not aim at the gaps or the plastic above them. Expect the ball to rebound toward the middle after contact.

Choose the launch return path

Launch

Soft to S

Use a part pull when you want S-O-U-L. The ball can roll into the S lane and bounce across the top lanes. Shift the lit letters before it arrives so each trip fills a missing letter.

Full to Perdition

A full launch can reach the far-right Perdition lane. There is no skill-shot bonus, but a made lane shortens the route to two-ball play.

Your first useful run

First route

A hand-painted 1930s cartoon underworld with a chrome ball moving from letter lanes toward two banks of contract targets.
First routeSpell S-O-U-L, clear contracts, earn the fifth-contract Extra Ball, then prepare Perdition.
1 · Soft launch toward S-O-U-L. Finish the four letters whenever the ball is already safely up top.
2 · Pick one contract bank. Start with the outside target, then finish whichever bank has fewer targets standing.
3 · At contract five, Extra Ball lights at the upper-right kicker. Earn it before hitting the Devil bumper.
4 · advance Perdition by sending the ball down the far-right lane until the third lamp captures it.
5 · Release the held ball with the Devil bumper, then use two-ball play for contracts nine, ten, and the final Devil bank.

All ten contracts and the Devil

Contracts

Two rows of contract targets climb through an infernal carnival toward a looming final bank under stage lights.
Contract climbFinish ten contract banks on one ball. The next completed C-U-P or M-U-G bank defeats the Devil.
The full list of contracts
#Boss presentationBonus unitMilestone
1Root Pack1,000Get the safer row under control
2Ribby & Croaks2,000—
3Hilda Berg3,000—
4Cagney Carnation4,000—
5Beppi the Clown5,000Lights Extra Ball; the Devil bumper can cancel it
6Wally Warbles6,000—
7Captain Brineybeard7,000Lights Special
8Cala Maria8,000—
9Dr. Kahl’s Robot9,000Get the ball resting on a flipper, ready for the last rows
10Phantom Express10,000The Devil appears
11Devil defeatCounter continuesNext completed C-U-P or M-U-G wins before drain

Contracts reset to zero when the ball is lost. S-O-U-L letters may persist by setting, but completed contracts do not carry to the next ball.

Perdition Multiball

Perdition

  1. Light the hold. Shoot the far-right Perdition lane. Not every trip lights a lamp; from a fresh game it takes five trips to light all three, and after a multiball it takes six.
  2. Capture. The trip that lights the third lamp is held. The held ball turns red, a blue ball is served, and a post keeps the red ball in place.
  3. Release. Hit the Devil bumper. The post drops, the held ball releases, and the Perdition lamps reset.
  4. Use it. There is no jackpot. The value is safety: while two balls are loose, keep one controlled and use the other to finish contract banks.
  5. Failure case. If you lose the active ball before hitting the Devil bumper, the multiball is canceled and the held ball is kicked back out.
  6. End. Once both balls are loose, the first lost ball ends two-ball play. The lamps can be built again on the same ball for another Perdition hold, but there is no ball saver, add-a-ball, third ball, or jackpot.

Extra ball, Special and settings

Extra play

Special

The card says contract ten awards a free credit. On this table, Special lights at contract seven. Earn it at the lower-left star target, or by finishing S-O-U-L while it is lit.

Replay and match

Replay scores, Special, and the end-of-game match award credits only. On free play, those credits are worthless for score progression: they do not add contracts, save Devil progress, or add another playable ball.

Settings

The table can use short two-inch or normal three-inch flippers, three or five balls, different replay scores, and double bonus on the last ball. Short flippers widen the middle gap, so target rebounds are more dangerous.

After contract five

Earn Extra Ball before contract six if the shot is reasonable. Work on S-O-U-L when the ball is already headed up top; a 4x bonus multiplies the same contract climb you are making anyway.

If Perdition is one trip from capture, save it for contract eight or nine. A second ball is most useful when the next bank reaches contract ten or defeats the Devil.

Modes, persistence and playing two features at the same time

playing two features at the same time

What plays at the same time, and what does not
  • Contracts and S-O-U-L score during one-ball and two-ball play. Use Perdition to finish rows that feel dangerous with one ball.
  • At contract ten, the next completed C-U-P or M-U-G bank wins. If the ball is lost first, the Devil losing scene plays.
  • Contracts do not carry over. Extra Ball matters because it gives another full attempt, not because it preserves the counter.
  • Perdition keeps its own count until two-ball play starts. Contract banks still count while two balls are loose.
  • There is no mystery award on this table. Do not wait for a bailout that is not coming.

Advanced scoring strategy and physics

Scoring

A two-ball infernal finale with one ball held safely while another attacks a glowing final target bank.
Final bankBring Perdition to the last contracts, control one ball, and finish the shorter target row.

Safe route

Raise S-O-U-L to 3x or 4x, earn the fifth-contract extra ball, and shoot outside targets from a controlled ball. Do not hammer the middle of a partly cleared bank unless it is the only target left.

Devil route

Get Perdition one trip from capture before contracts eight and nine. Start two-ball play for the last banks, then finish whichever row has fewer targets standing after contract ten.

Point route

Contracts pay as end bonus, so S-O-U-L multiplier is the main scoring lever. Perdition has no jackpot; its job is protecting the contract run. The biggest priorities are 4x bonus, Extra Ball, contract ten, and the Devil-defeating bank.

Row control

From a controlled ball, use a short flip into the nearest outside target. A full-power hit into the center of a bank can rebound straight down the middle.

Nudge as the ball leaves the target, while it can still be pushed away from the center. After one target drops, reassess; the other bank may now be the safer finish.

The upper-right kicker and Perdition lane are steep, narrow shots. Make them from the opposite flipper when the ball is settled. In two-ball play, keep one ball parked when possible, then continue toward Perdition if the run continues.

From the video

Video

  1. 1:38 — there is no skill-shot bonus on this table.
  2. 2:19 — knocking a row down is a contract; the fifth lights an extra ball, earned at the upper-right kicker.
  3. 3:26 — a full-strength launch can reach the Perdition lane.
  4. 4:25 — the three small targets on the left light both DASH targets.
  5. 4:41 — launch softly toward the S when you are working on S-O-U-L.
  6. 12:16 — red ball is Cuphead, blue is Mugman.